27 February, 2010

It is a Bugaboo Blog Hop and A Green Challenge

Hi All, Welcome to my stop on the Hop. If you are comeing here from Sandye's blog you are in the right place. If you just stopped in go to Catch The Bug Challenge Blog to start on the Challenge Hop. You need to see what all the Design Team Members have done for inspiration for you. So the theme is green. Make a card, layout or altered item that is green, that represents the Go Green Theme or Would be good for St. Patricks Day. Use Green and a Bugaboo Stamp. You can get the newest Freebie Here. You could win. 1st place is 7 Bugaboo stamps of your choice, 2nd is 4 stamps and 3rd is 2 Stamps. Good Luck!


This is my first card to share with you. I'm using a cute little bear from the Rainy Day Bears Digis. Paper is Prima and the bubblewrap looking stuff behind the Bear is made using acrylics and bubblewrap. Tons O Fun to make. I think Gus is just Great and you can find more Here. I used Basic Grey and a piece of hand altered paper behind Gus for this card.


Corned Beef Anyone? This is my version of St. Patricks Day card. I liked Chef Pierre and thought he would look good in a green kilt.


Thanks for stopping by and now you are off to Tammys to check out what she made to share. Wait till you see this.


Have a great rest of the weekend everyone.

26 February, 2010

It is Friday Freebie at Bugaboo

Today is Friday Freebie and does Jodie have a cutie for you. This is Scarlette and she is totally Unique. I used my copics for coloring and faux stitching to set off the Creative Imagination Papers. I can't wait for you to see what all the Design Team Members did over at the Bugaboo Blog. Also don't forget to check out the store to see the other Scarlette Digis. Tomorrow is another Challenge at Bugaboo so don't forget to come buy and join us. Great Prizes everyone. Who doesn't like that?
Have a fun weekend.

23 February, 2010

New Release and a Sketch

New Release Day at Bugaboo
And isn't this cute. Wait until you see the others that are in the store Now! Go check them out and also stop by the other Design Team Members blogs to see what they came up with. The list is over on the sidebar here. And then we have Stella as a nurse. I'm not sure i would want her as my nurse, but, then again.
It might be a Hoot! Sketches By Tamara...
has a Journaling Challenge for you this week.
The challenge is to Journal about an interesting characteristic or trait of someone you love.
Well here is my take on that. Claudette and KayLynn were goofing around one morning before school and Claudette was trying to teach KayLynn how to roll her tounge. Can you do that? I'm sure a lot of people can but for a Four Year Old it is very hard.
I used My Minds Eye Paper for this layout and Flower Watercan Can Digi Stamps by Bugaboo Stamps.

I did a lot of cutting on this layout but it was also handy that My Minds Eye makes these wonderful punch outs, tags and overlays that match a lot of their paper lines.

I love these Watercans by Bugaboo.

Have a Great Day everyone.

22 February, 2010

Anything But A Card and a Challenge

It is Anything But A Card over at Bugaboo today and it is my turn to share with you. I just love these Flower Block by Jodie and you can find six more designs Here. These are perfect for these little boxes. I print out the image on 3 different pattern papers and then one on white. I cut each layer out reducing the area of each layer. I colored the flowers and leaves with copics and then added just the flowers on the last layer. A little crystal effects in the centers and there you go.

I love double sided paper. This is Basic Grey and it makes a very nice box.

Today over at The Pink Elephant Challenge #55. Bugboo Stamps is the Sponsor this week so run on over there and join in the fun. Here is the sketch we used for this week.


I used some of the Bugaboo Brats for this card and again some Basic Grey Paper. They should put me on their payrol. LOL Aren't these little Brats cute. You can find all seven different ones Here.


And here is another card that I made just for fun.


Have a great day and I will back tomorrow with New release at Bugaboo and a Sketches by Tamara.

19 February, 2010

Freebie Friday At Bugaboo

It is Friday again (where did the time go?) and that means Free Stamps at Bugaboo. Woo Hoo!
How cute is this Baby Mouse? And there are 6 more designs in the store. I'm off to get a few for myself. I used My Minds Eye Paper for this and colored with my Copics. Don't miss whhat all the Design Team Members did over on the Blog. These Flower Tags are great and can be used for all sorts of things. Alone they look lovely, As Buttons and or flower centers they are great and they would make really nice photo frames. You can also use them as Tags on a layout or a gift or a card. You get the idea. Again 6 more designs in the store to go along with your Freebie.
I really like the doily here but my favorite thing on this easel card is the green lattice piece that I punched with my new MS edge that I got for a birthday present. My friends (student) brought cake and cards and this wonderful punch. Isn't it cool?

A really close up. I auctually stitched the buttons onto the cute little Prima flowers that I first covered in Stickles. I covered the main part of the button with Crystal Effects.


Have a great day everyone. Mine is going to be long, I sure hope I can get a little nap later.

17 February, 2010

A New Challenge at Sketches.

This week at Sketches By Tamara we are having a recipe challenge. This is a challenge comes fro Marcia. The challenge is to use at least these three items: Staples; Stitching, faux or real; and Stamping. We really hope you join us and share your project by leaving a comment on the Sketches blog.
I did this layout of my granddaughters and I that we took by holding the camara out in front of us and taking our picture of ourselves. That is a very hard thing to do and get one that everyone is happy with. Thank goodness for digital. The papers I used here are Bo Bunny. I used staples on the photo that I distressed and again along the right hand side on the scallop piece. I made the flowers by cutting and layering some of the pattern papers and also stamping with Hero Arts ,new line of flower stamp, cutting, layering and added a rhinestone to the center.

Stitching by hand around the circle.

And the Birds at the bottom are stamped and paper pieced and embossed. I just love the color combo here.


I hope you all have a great week.

15 February, 2010

A New Project

I have had a great weekend and I hope you all have to. Starting with the Opening of the Olympics on Friday night and then Sat. I went and picked up my Tim Holtz 12 new Ink Pads and a Cuttlebug Die and 4 Embossing Folders combo (The butterflies below.) And then Sat. afternoon and Sunday morning I got to work on this layout. I have beeen kicking this idea around all week but I was amazed how it just took on a life of its own once I got started. I used a new paper pad I got by K and Co. and the chipboard and acrylic butterflies and bugs that go with the paper as well as a Matt Pack that has these wonderful transparencies frames. What got me going on this layout was a tutorial that Scrapperlicious posted last month on using Glossy Accents on the surface of acrylic and then using Alcohol inks on the back. I did not build up the Glossy Accents as much as she did in her example. That is what you see on the upper right and lower left corner. The butterflies here are Cuttlebug cut and embossed from hand painted paper i made.


The letters are painted with Crackel Paint and then given a coat of Crystal Effects. Look at that adorable little bird piece


A close up of the letters. The silk flowers have glitter pen highlights and rhinestone centers.

These overlays are too cool.

Cool butterfly
And heart and key.


I stitched around the overlays with metalic fibers.


I used some leftover rub ons and I love the way the flowers turned out.

The flowers are punched from paper that I colored with the Smooch and lift technique and then I dry embossed them from the back to give them more dimension. It is a little hard to see but the buttons i used for the centers are really cool. The bling is Prima.
Oh yea. Aren't those cute girls? My granddaughters Claudette and KayLynn.


Have a great day everyone.

13 February, 2010

New Challenge AT Bugaboo

So did you all watch the Olympic Opening Ceremony last night? Well to celebrate the opening of the games this week the Challenge at Bugaboo is to create a card, layout, tag or item that could be used for Encouragement or a loosely based Olympic Theme using the rings or circles. Go to Bugaboo and post a link to Mister Linky so we can all come see. You can find all the details Here.
So here are my samples that I made to help inspire you. I was amazed at how easy it was to adapt the images so they would fit the theme just by using color and the sentiment. What little kid wouldn't enjoy getting this if he/she were trying out for a team sport or writeing a report?
And of course this is for our neighbors and all my friends in Canada. Beautiful Opening Ceremony last night.


So I can't wait to see what you all have to share this week.
Have a fun weekend and I will be back soon.

12 February, 2010

It is Friday Freebie at Bugaboo.

It is Friday Freebie over at Bugaboo stamps. Aren't these adorable. Run on over there and pick them up. And tomorrow is our Second Challenge over at Bugaboo Challenge Blog so don't forget to check back tomorrow. We have lots of fun examples to show you. If you have a little one that is going to be loosing teeth soon this would be a fun card to have on hand. Or if you have a husband that is loosing teeth (like mine who broke two off a couple of weeks ago. He has to give up that hard candy.) The background paper is some that I made last weekend.
I did this earlier this week just because. It is one of the Pink Ribbon Gals over at Bugaboo too. Jodie has so many images it just amazes me.


This is an image by Shirleys2Girls. I just love that cat in the package. Papers are Basic Grey and Buttons are Wall Mart.


Check out this little cutie that I picked up over at Mo's Digital Pencil Wed. morning. I used my Copics to color her and Bo Bunny Papers. The flowers are from some stems I picked up at Michales on sale for 50% off and then I added some Glitter Pen and a rhinestone and layered them up.


Have a great day, enjoy the opening ceremony of the Olmpics and do come back tomorrow and see what I created for the new Challenge at Bugaboo Stamps this week.


09 February, 2010

Wednesday Technique Day at Bugaboo

Welcome to my Bugaboo Tutorial on the smoosh and lift background Technique. I love this technique and you can do this with resist like I am going to show you or you could just use this for your background paper. Stamp over it, whatever you like. It is fun.
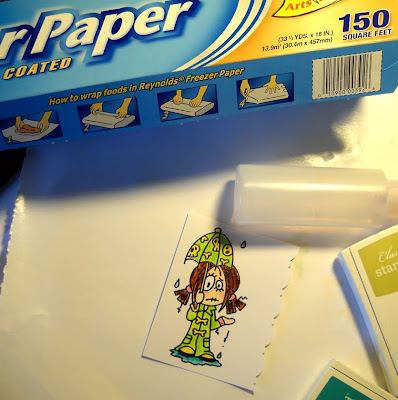
You will need one of those neat Ranger non-stick craft sheets or something similar like, my Favorite, Freezer Paper. Wax paper would work also. Ink pads in desired colors, a spray bottle of water, Versamark pen and clear embossing powder as well as Ranger Ultra Thick Embossing Powder and a Heat tool for Embossing.
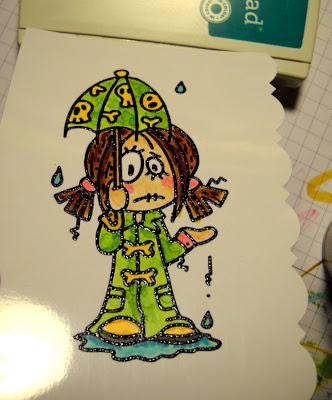
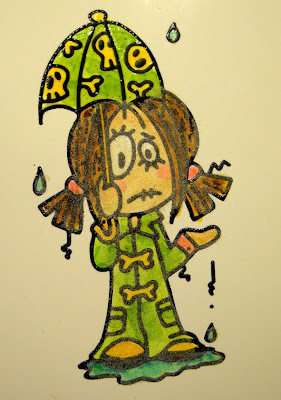
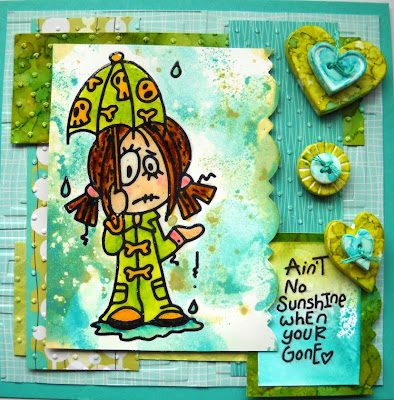
I printed my image Skelekinz, Aint No Sunshine by Bugaboo Stamps, onto glossy paper and embossed the image as soon as it came out of the printer, more like as it comes out of the printer. I used a Martha Stewart punch to punch the edge here and I colored the image with Copics markers.


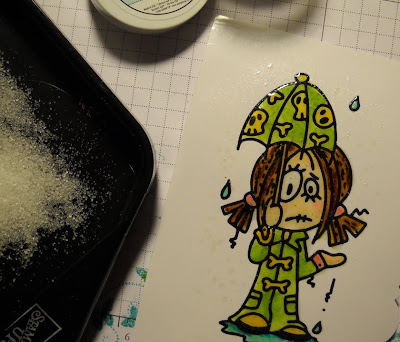
Once the image is dry use a Versamark pen to cover the different sections and sprinkle on 
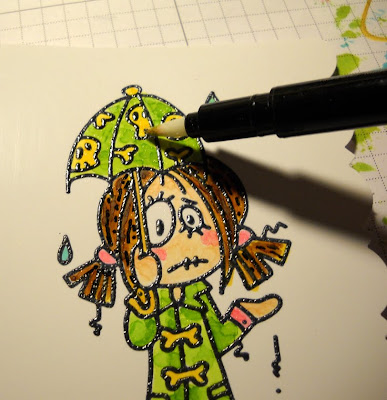
clear Embossing Powder.


Heat with the Heat tool to set.


Do the entire image with clear. Onec that is finished use versamark all over the image again and sprinkle on

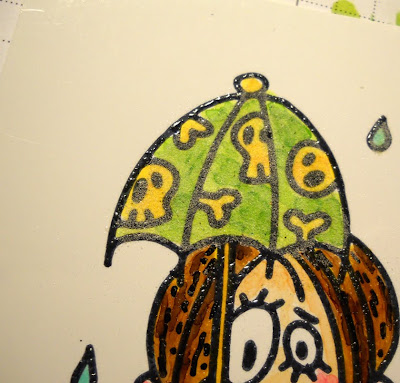
thick embossing powder like the Ranger Ultra Thick Embossing Powder. If this powder sticks to some of the areas outside the image area that is fine and will add to the overall resist effect. You could brush this off if you prefer.


Heat this layer from the underneath side so as not to blow the embossing powder off the surface.


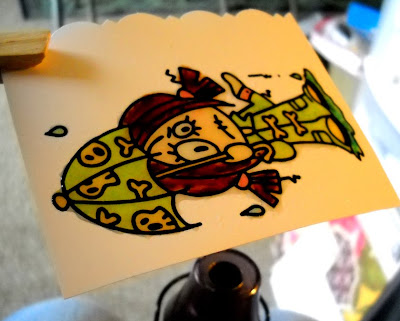
Once you have the image covered with the embossed resist you are ready for the really fun stuff. Here is where the Freezer Paper, ink and spray bottle comes in.


The First Step:


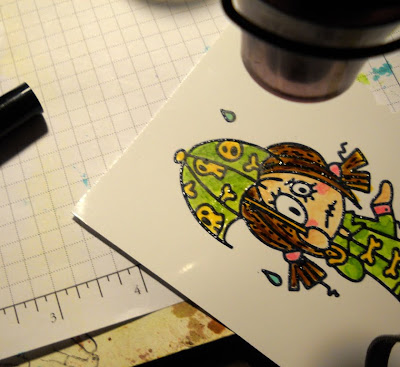
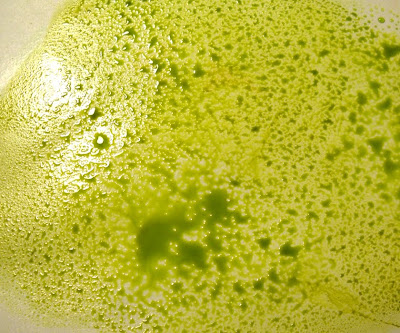
The first step is to smear the ink directly onto the Freezer paper. Spray the ink with water. You can use as much or as little as you like. The more water the less opaque the ink will be. You can always add more later if you like. You can't take it back off. Lay the paper onto the ink and then lift it up.


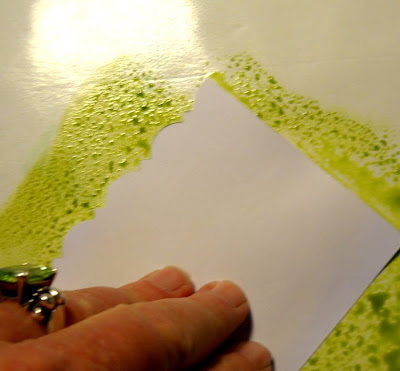
Check the results. If you want to do more you can. What really looks good is to let the first layer dry (you can use a heat tool to dry if you like) and then smooch again. This builds up the ink in layers.


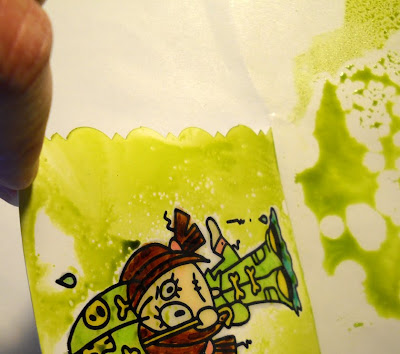
Wipe the extra wet ink from the image itself.


Smear a second color on the freezer paper, spray with water again and smooch the image down. Clean the excess off the image with paper towel.

Now spray that with water and do the smooch and lift technique again.


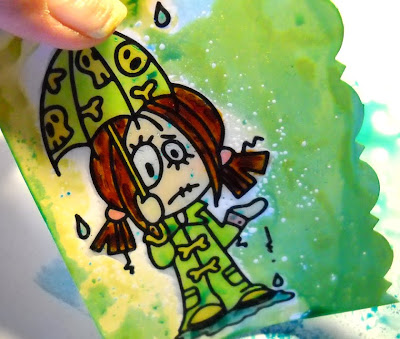
Now all you need to do is put it all together.


You can use this method on plain cardstock as well. Experiment and have fun.


If you like the look of the buttons you can find a Tutorial Here.


I hope that if you decide to try this technique out you will let me know. Just post it on your blog and leave a link here in the comment section.
Have a good day everyone.